How to Remove Brake Dust from Your Wheels Using Chemical Cleaners

By Ali Hasan Omar | November 3, 2024
Introduction
Brake dust is a common issue for car owners that dulls the appearance of wheels. It originates from the wear of brake pads and rotors. Left untreated, brake dust can accumulate and degrade the wheel’s finish. Using the right chemical cleaners and proper techniques, you can safely remove baked-on brake dust and restore your wheels to a like-new shine. This guide outlines the most effective and safe methods for brake dust removal.
Why Removing Baked-On Brake Dust is Crucial
Brake dust is not only unsightly but also mildly corrosive. The microscopic ferrous particles in brake dust can embed into the wheel surface, causing staining, pitting, and corrosion if left untreated. Regular cleaning prevents long-term damage and preserves the aesthetic and structural integrity of your wheels.
Choosing the Right Wheel Cleaner: Safety and Performance
Professional detailers rely on various products, primarily commercial wheel cleaners designed for automotive use, as they offer superior safety and efficacy compared to household alternatives.
Acidic Wheel Cleaners
These cleaners contain active ingredients like hydrofluoric or sulfuric acids that dissolve ferrous metals present in brake dust. They are effective on coated aluminum wheels but require careful use due to their corrosive nature. Protect your skin and eyes by wearing gloves and goggles, follow dilution instructions precisely, and avoid prolonged exposure to prevent damage to wheel coatings or plastics.
Non-Acidic Wheel Cleaners
Often alkaline-based, these cleaners can also be corrosive despite their milder reputation. pH-balanced formulations offer a gentler alternative but might be less effective against stubborn brake dust. Products with specialized catalysts to break down ferrous particles provide a good balance between safety and cleaning power.
Essential Tools and Products
- Wheel cleaner specific to your wheel type (alloy, chrome, painted). One hig-quality and cost-effective product is COMMA Brake & Parts Cleaner.
- Soft-bristle wheel brush or detailing brushes for crevices.
- Microfiber towels for drying and buffing.
- Hose or spray bottle with clean water.
- Optional: Wheel sealant to protect against future brake dust buildup.
Step-by-Step Guide to Remove Brake Dust
Step 1: pre-Rinse the Wheels Thoroughly
 Thoroughly rinse wheels with water to remove loose dirt and prevent surface scratches during cleaning.
Step 2: Apply the Chemical Cleaner
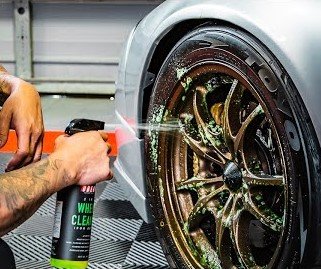 Spray the chemical cleaner liberally over the wheel surface, focusing on brake dust-heavy areas such as lug nut wells and the inner barrel. Adhere to the manufacturer’s recommended wait time.
Step 3: Allow the Cleaner to Penetrate
 Let the cleaner dwell for 1 to 3 minutes without drying, enabling breakdown of brake dust and contaminants.
Step 4: Agitate with Soft-Bristle Brush
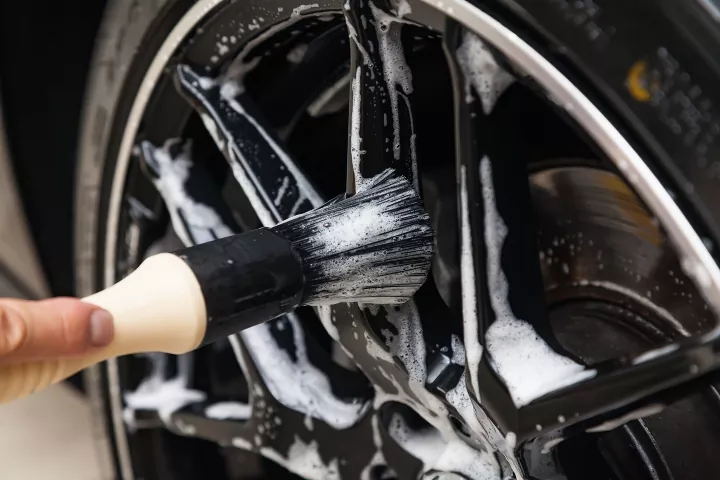 Gently scrub using a soft-bristle brush to lift residue without damaging the finish. Use smaller brushes for tight spots.
Step 5: Rinse Thoroughly
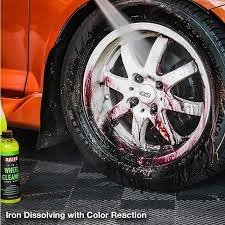 Remove all cleaner and loosened debris with clean water to prevent residue buildup.
Step 6: Dry and Inspect
 Dry wheels completely with microfiber towels to prevent water spots and inspect for remaining brake dust. Repeat treatment if necessary.
Step 7: Optional Wheel Sealant Application
Sealants provide a sacrificial barrier against brake dust adhesion, facilitating easier future cleanings and protecting wheel finishes.
Using Brake Dust Erasers
Brake dust erasers are helpful for tackling baked-on brake dust. These non-abrasive pads are designed to attract brake dust without scratching your wheels. They’re especially effective for reaching hard-to-clean areas like curves, corners, or lug nut cavities. We highly recommend having a brake dust
Preventing Brake Dust Accumulation
- Clean Wheels Regularly: Regular cleaning helps prevent heavy buildup and makes future cleanings easier.
- Use a Wheel Sealant: As mentioned, sealants create a slick surface that repels brake dust and keeps wheels looking cleaner.
- Switch to Low-Dust Brake Pads: If brake dust is a persistent problem, consider using ceramic or low-dust brake pads, which produce significantly less dust than traditional ones.
Tire Health Monitoring and Safety
Maintaining tire health is vital for overall vehicle safety and complements wheel care. Perform tread depth checks, maintain proper tire pressure, inspect for damage, and rotate tires according to manufacturer guidelines.
To maintain tire health and safety, consider the following:
- Tread Depth Check: Ensure your tire tread is above the minimum legal limit, as recommended by the manufacturer, to maintain grip and prevent hydroplaning.
- Pressure Adjustments: Regularly check and adjust tire pressure to the manufacturer’s specifications to ensure optimal contact with the road and prevent uneven wear.
- Visual Inspections: Look for signs of damage, such as cuts, bulges, or foreign objects that could lead to tire failure.
- Rotation Schedule: Follow the manufacturer’s suggested tire rotation pattern to promote even tire wear and extend the life of your tires.
Safety Tips
- Use Gloves and Eye Protection: Chemical cleaners can be harsh, so protect your skin and eyes while using them.
- Test in a Small Area First: Always apply the cleaner to a small, hidden section first to verify it is safe for your wheel’s finish.
- Avoid Using Acidic Cleaners on Uncoated Wheels: Some cleaners contain acids that can damage certain wheel finishes, so check your cleaner’s ingredients if you’re unsure.
Summary
Routine and thorough brake dust removal enhances both the visual appeal and longevity of your wheels. By selecting appropriate cleaners and following detailed application steps, you can efficiently eliminate brake dust deposits. Incorporate regular maintenance and protective sealants to ensure your wheels remain bright and damage-free, allowing you to drive with confidence.
FAQs
What is brake dust, and why does it build up on wheels?
Brake dust consists of tiny particles from brake pads and rotors that accumulate on wheels over time, especially during braking. It’s common in all vehicles but can become corrosive if left untreated.
Is it safe to use chemical cleaners on all types of wheels?
Most wheel cleaners are designed for specific finishes like alloy, chrome, and painted wheels. Check the cleaner label to ensure compatibility with your wheel type.
How often should I clean brake dust off my wheels?
For the best results, clean your wheels at least once a month or whenever you notice visible buildup. Regular cleaning prevents dust from bonding to the surface.
Can brake dust damage my wheels if left uncleaned?
Yes, brake dust can corrode and stain wheel surfaces over time, especially on alloy and chrome finishes, leading to pitting and long-term damage.
What’s the best type of brush for cleaning brake dust?
A soft-bristle wheel brush is ideal, as it effectively lifts dust without scratching the wheel’s finish. Avoid using stiff or abrasive brushes.
Should I use warm or cold water to rinse the wheels?
Either is fine, but warm water may help dissolve grime more easily. Be sure to rinse thoroughly to remove all cleaner residues.
Is a wheel sealant necessary, and what does it do?
Wheel sealant is optional but highly recommended. It creates a barrier that repels brake dust, making wheels easier to clean and keeping them looking shiny for longer.
Can I use household cleaners instead of wheel-specific products?
It’s not recommended, as household cleaners may be too harsh or ineffective on wheels, potentially damaging the finish. Use a cleaner specifically formulated for wheels.
How long should I let the wheel cleaner sit before scrubbing?
Most cleaners need 1-3 minutes to break down dust and grime. Check the product instructions for the exact time to avoid letting it dry on the surface.
What’s the best way to dry wheels after cleaning?
Use a clean microfiber towel to dry each wheel. This helps prevent water spots and allows you to inspect the wheels for any remaining brake dust.


