How to Clean and Restore Your Car’s Headlights with Chemical Solutions
By Ammar Hassan Merie | October 25, 2024

Clear and well-maintained Car’s Headlights are essential for both the aesthetic appeal of your vehicle and for ensuring optimal visibility, especially during nighttime driving. Over time, however, headlights can become cloudy, yellowed, or hazy due to various factors such as UV exposure, environmental contaminants, and road debris. Dull headlights not only detract from your car’s appearance but also pose a significant safety risk. Fortunately, with the right chemical solutions and proper technique, you can restore your headlights to their original clarity.
What Causes Cloudy Car’s Headlights?
When a car is new, all parts, including the Car’s Headlights, appear crystal clear. However, over time, headlights may become foggy due to:
- Oxidation: Most modern headlights are made from polycarbonate plastic, which is more durable than glass but susceptible to oxidation. Prolonged exposure to UV rays causes microscopic cracks, resulting in a yellow or cloudy appearance.
- Time and Weather Conditions: Although manufacturers apply a protective coating to the headlights, constant exposure to harsh weather can wear this coating away, accelerating the degradation.
- Water Vapor: Condensation inside the headlight housing can cause fogging, which may lead to dullness if not addressed.
- Dirt and Chemicals: Frequent exposure to road debris, dirt, and various chemicals can form a layer of grime that dulls the surface of the headlights.
Step-by-Step Headlight Restoration Guide
Follow this guide to effectively clean and restore your car’s headlights using chemical products.
Step 1: Assess the Condition of Your Headlights
Before beginning, evaluate the condition of your headlights to choose the right approach:
- Light Oxidation: Slight yellowing or haziness can typically be addressed with mild cleaners.
- Heavy Oxidation: Deep cloudiness or a chalky surface may require more intensive chemical solutions and polishing. Assessing the severity will guide your choice of cleaning products.
Step 2: Gather the Necessary Materials
For professional-grade headlight restoration, you will need:
- Soap and water
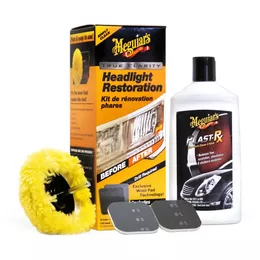
- A headlight restoration kit or chemical headlight cleaner
- Microfiber cloths
- Masking tape (to protect the surrounding areas)
- Sandpaper (for severe oxidation)
- Protective gloves and eyewear
- UV sealant (to protect against future damage)




Step 3: Prepare the Headlights for Cleaning

- Clean the Headlights: Start by washing the headlights with warm soapy water and a microfiber cloth to remove surface dirt and grime. Dry thoroughly before moving forward.
- Protect the Surrounding Area: Use masking tape to cover the areas around the headlights, such as the paint and nearby plastic parts, as some chemicals and sanding processes can damage these surfaces.
Step 4: Choose the Right Chemical Solution
There are two primary types of products you can use:
- Dedicated Headlight Cleaning Solutions: These are specifically formulated to remove oxidation and restore clarity. They often contain abrasive materials that break down the oxidized layers.
- Multi-purpose Car Cleaners: Products like rubbing compounds or plastic polishes can also work, but may require more effort and multiple applications.
If using a restoration kit, it typically includes a cleaner, polish, and a sealant for a complete restoration.
Step 5: Apply the Chemical Cleaner
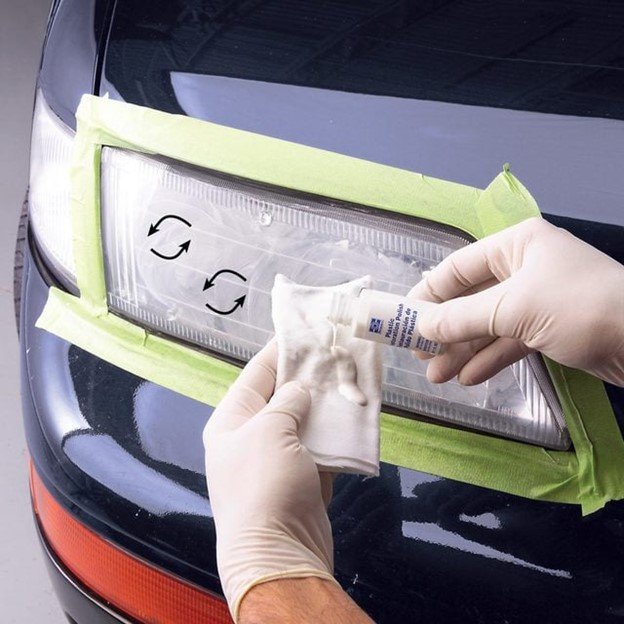
- Apply the Cleaner: Following the manufacturer’s instructions, apply the cleaner to a microfiber cloth and rub it onto the headlight in circular motions for even coverage. The chemical solution works to break down the oxidized layer.
- Buff the Headlight: After applying the cleaner, use a polishing cloth to buff the surface, removing the hazy layer and restoring clarity. For added efficiency, you may opt to use a buffing tool with a polishing pad.
- Repeat if Necessary: If the headlights remain cloudy, repeat the process. For severe oxidation, consider using fine-grit sandpaper to remove deeper damage.
Step 6: Sanding for Heavy Oxidation (if applicable)
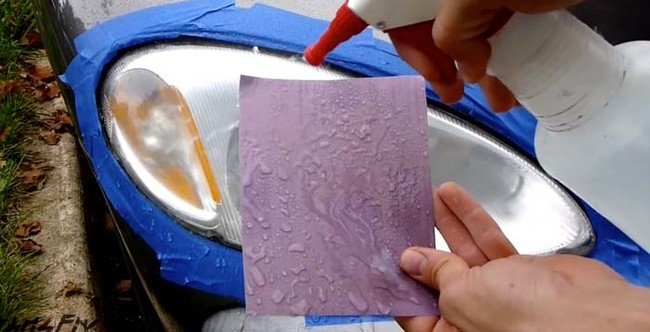
- Wet Sanding: If your headlights are severely damaged, wet sanding with fine-grit sandpaper (starting with 800 grit and progressing to 2000 grit) may be necessary. Always keep the surface wet and sand in circular motions to avoid scratching.
- Reapply Cleaner or Polish: After sanding, reapply the chemical cleaner to polish the surface and remove fine scratches left by the sandpaper.
Step 7: Apply a UV Sealant
Once the headlights are clear, applying a UV sealant is essential to protect them from future oxidation. UV sealants act as a barrier against the sun’s rays, which can cause yellowing and cloudiness. Follow the manufacturer’s instructions and allow the sealant to fully cure.
Step 8: Final Buff and Clean
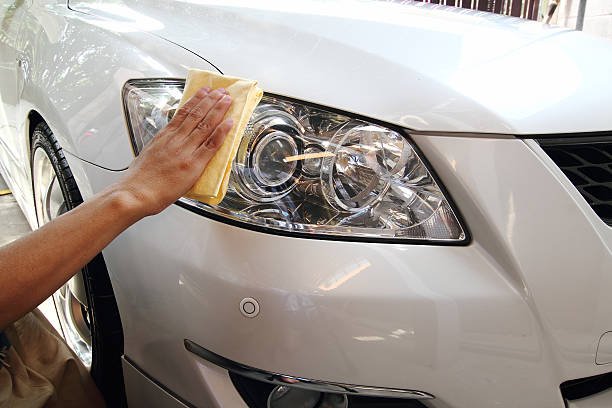
After applying the UV sealant and allowing it to dry, give the headlights a final wipe-down with a clean microfiber cloth to remove any residue and ensure a streak-free, crystal-clear finish.
Tips for a Professional Finish
- Always wear protective gloves and eyewear to safeguard against harsh chemicals.
- For stubborn stains, consider using toothpaste as a DIY cleaner. Apply a small amount to a microfiber cloth and rub in circular motions, then rinse thoroughly.
- Applying a coat of wax after cleaning can help prevent future oxidation and extend the life of the restoration.
- For a natural alternative to commercial cleaners, mix baking soda with white vinegar and scrub gently before rinsing.
Why Use Chemical Solutions for Headlight Restoration?
- Efficiency: Chemical cleaners are designed to cut through oxidation and grime more efficiently than DIY solutions like toothpaste or baking soda, saving you time and effort.
- Professional Results: High-quality restoration kits and chemical products deliver longer-lasting clarity and often include protective elements, such as UV sealants, that prevent further damage.
- Cost-effective: By restoring your headlights with chemical solutions, you can avoid the cost of replacement and extend the life of your headlights, keeping your car looking good and enhancing safety.
We recommend FÖRCH Glass Cleaning Foam R530, an intensive cleaner specifically designed for glass surfaces and plastic headlight lenses, ideal for commercial use.
Maintaining Your Restored Headlights

To maintain clarity, regularly clean your headlights and reapply a UV protectant every few months. Additionally, parking in shaded areas or using a car cover can help minimize UV exposure and slow down oxidation.
Conclusion
By following this guide and using the right chemical solutions, you can restore your headlights to like-new condition, improving both the appearance of your vehicle and your safety on the road. Regular maintenance and UV protection will ensure your headlights stay clear for years to come.
FAQs
What causes car headlights to become cloudy or yellowed?
Cloudy or yellow headlights are primarily caused by oxidation from UV exposure, dirt, chemicals, and environmental factors like water vapor and harsh weather.
Can I restore my headlights without using a chemical solution?
While DIY solutions like toothpaste or baking soda can offer temporary results, chemical cleaners are more effective for long-term restoration and clarity.
How do I know if my headlights need restoration?
If your headlights appear cloudy, yellowed, or reduce visibility at night, they likely need restoration. Heavy oxidation may require more intensive cleaning and polishing.
What materials do I need for headlight restoration?
Essential materials include a headlight restoration kit or chemical cleaner, microfiber cloths, soap and water, masking tape, sandpaper, and UV sealant.
How long does it take to restore headlights?
Depending on the condition of your headlights, the process can take between 30 minutes to an hour, especially if sanding or multiple applications are needed.
Can I use regular car cleaners to restore headlights?
Yes, multipurpose car cleaners like rubbing compound or plastic polish can work, but dedicated headlight restoration products are generally more effective.
Do I need to sand my headlights?
Sanding is only necessary for headlights with heavy oxidation or deep cloudiness. In these cases, wet sanding with fine-grit sandpaper helps remove the damaged layer.
Why is it important to apply a UV sealant after restoring headlights?
UV sealant protects your headlights from future oxidation by blocking harmful UV rays, ensuring the clarity lasts longer.
How often should I clean and restore my headlights?
Headlights should be restored when they begin to show signs of cloudiness or reduced brightness. Applying a UV sealant every 3–6 months can prolong the restoration results.
Can I use power tools for headlight restoration?
Yes, using power tools like a buffing wheel on an angle grinder can make the process faster and provide a professional finish, especially for heavily oxidized headlights.
What are the safety precautions for headlight restoration?
Always wear gloves and protective eyewear to avoid contact with harsh chemicals. Also, use masking tape to protect surrounding areas from accidental damage.
How can I prevent my headlights from becoming cloudy again?
To maintain clarity, wash your headlights regularly, apply a UV sealant every few months, and try to park in shaded areas to minimize UV exposure.


